A lot of people think that the more reconstruction is done, the better the hair will be. Reality is not quite like that and care must be taken not to have just the opposite effect to the desired one. If you're having doubts about how to insert hair reconstruction into your schedule, in this post we'll show you everything you need to know. We're going to talk about the best brands on the market and their respective prices, in addition to teaching you amazing homemade recipes for those who want to save money and can't afford expensive products.
About Hair Reconstruction
Before doing the first capillary reconstruction you need to know exactly how it works. There are many myths out there that can end up destroying your hair instead of returning nutrients. Below we will show you in more detail the answers to all your questions. You won't be left out, will you?
What is it? What is it for?
Many people have doubts about what hair reconstruction is, as it is also called botox and hair mass. The name of this technique is already quite explanatory: it is a process that rebuilds the threads, that is, it returns all the nutrients that were lost either by chemical action, excessive exposure to the sun or constant use of the pool.
There are several types of capillary reconstruction, some can be done at home while others are recommended to seek out a good professional.
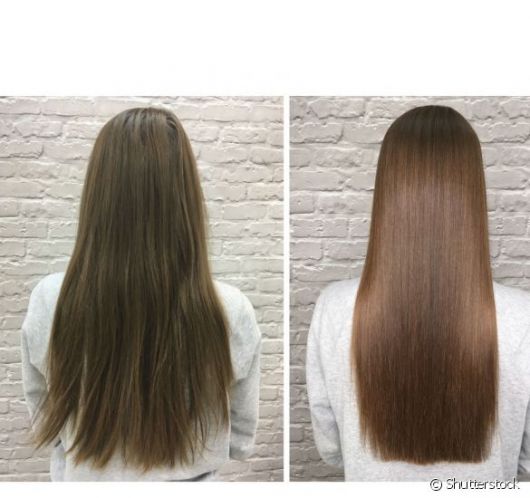
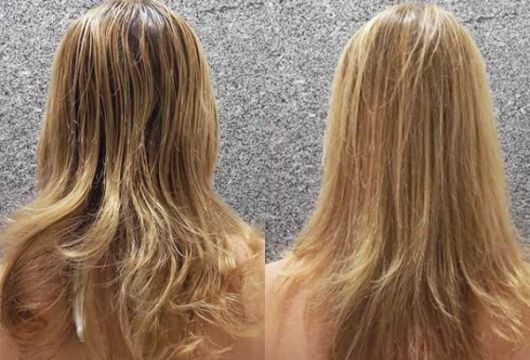
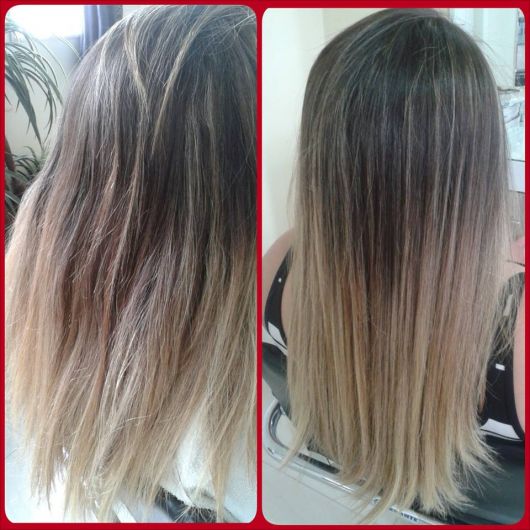
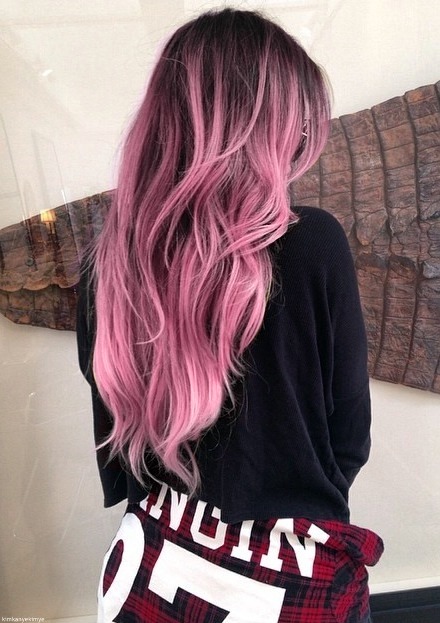
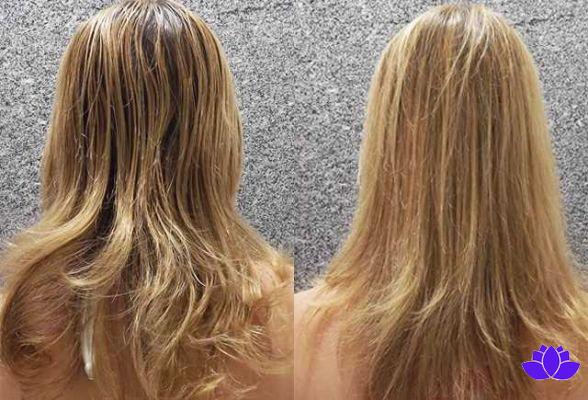
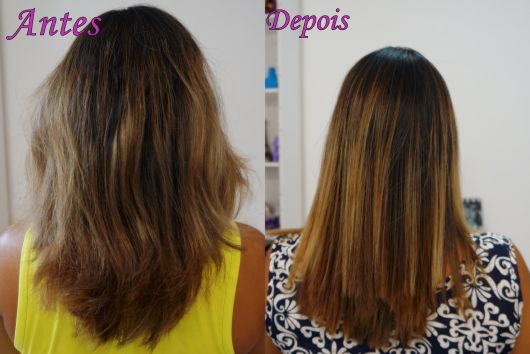
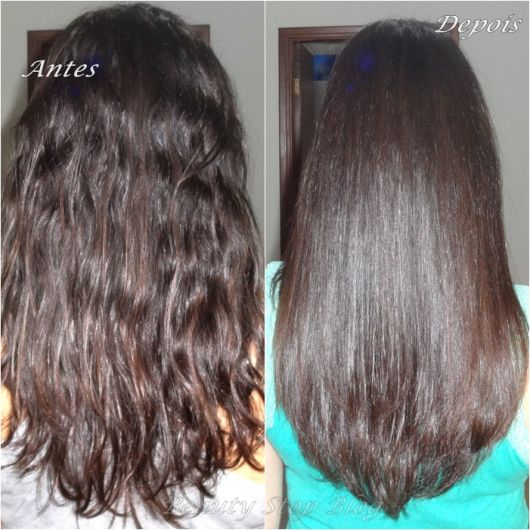
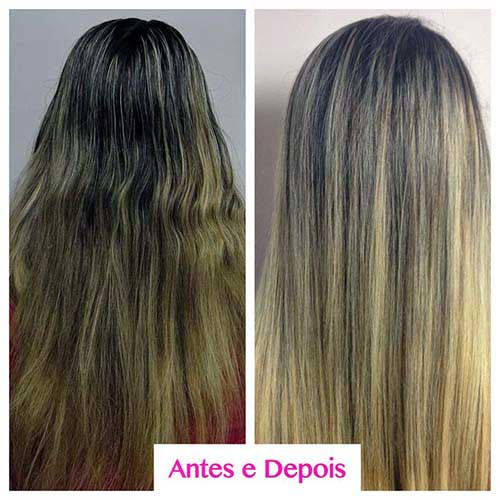
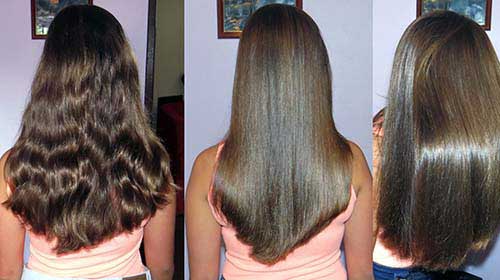
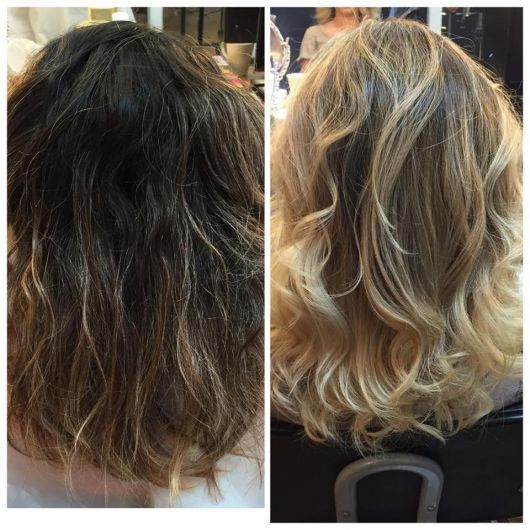
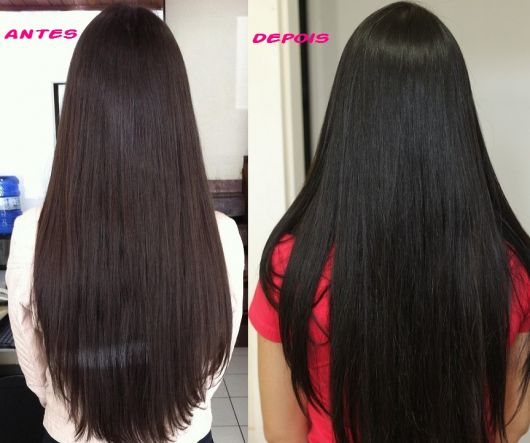
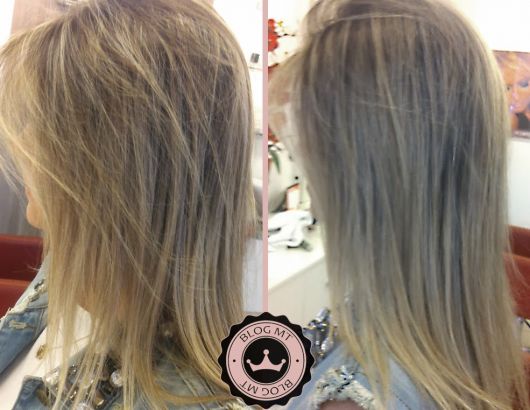
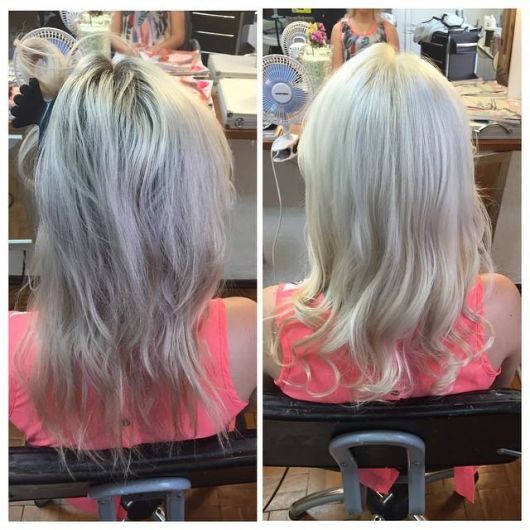
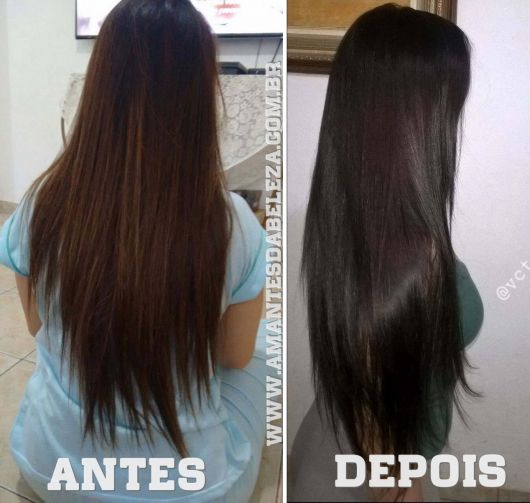
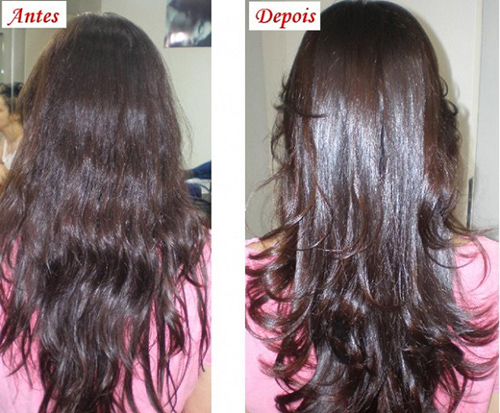
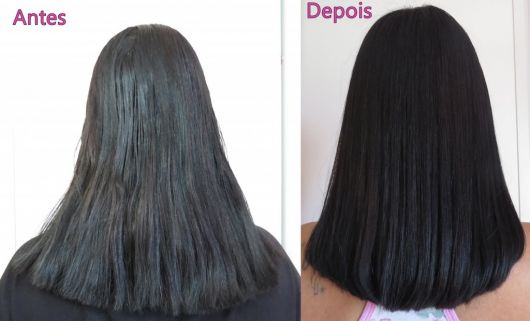
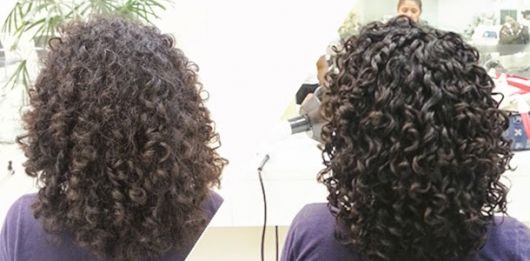
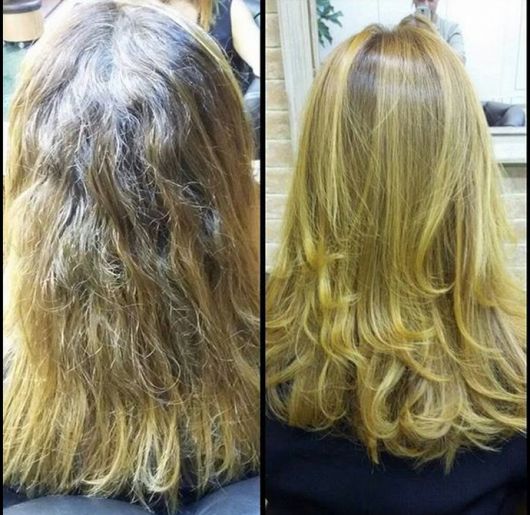
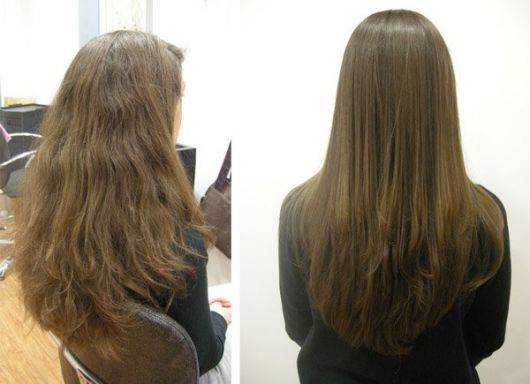
When looking at photos of before and after hair reconstruction, it is possible to see that the strands are brighter, softer and silkier. If you have highlights, ombré hair, highlights, Californians or any other type of discoloration, it is essential to have your hair reconstructed at least once a month.
Ever heard of hair with ends looking like straw? It's a lack of following the capillary schedule correctly. The discoloration attacks the wires, but there is no problem doing it, as it is possible to recover by doing the maintenance correctly.

Who can do it?
Hair reconstruction is done mainly by those who have some type of hair chemistry: progressive, guanidine straightener, dye, henna, lights, among others. Every chemical harms the hair, some less than others. When you straighten with progressive, for example, you are changing the structure of your strands and taking away important nutrients. That's why we always say that to have dyed hair you need dedication to care for and keep your hair always beautiful and healthy.
In addition to cases of chemically treated hair, capillary reconstruction is indicated for those who have fine and brittle hair, use bow ties frequently, take frequent baths in the sea or swimming pool or even for those whose hair has been damaged due to an illness. or smoking.
How much does it cost? #price
The price of hair reconstruction varies greatly from one salon to another, between R$60 and R$200, so it is important to do a lot of research and check out indications to invest in the right treatment. For those who want to save money, the tip is to buy the treatment mask to make at home, it does not pose any risk and is super easy. The top products on the market cost between R$200 and R$350, it seems to be more expensive, but it yields many applications, you can even call your friends to have a beauty day and share the price.

Reconstruction X Cauterization: What's the Difference?
The two techniques have the same objective: to return the capillary mass. Although the effect is very similar, the way of doing it is different. The main difference is the type of product, in cauterization we use liquid keratin while in reconstruction we use a mask.
Both techniques can be part of your capillary schedule, obviously not on the same day. You can do the cauterization in one week and the following week do the reconstruction.
It is necessary to be careful with excess, as it is a myth to think that the more times you cauterize, the prettier and healthier the thread will be. Excess can make the thread hard, so never do more than one month in the same week.

Is Too Much Bad for You?
As we said earlier, all excess is bad. Think that you are replenishing the thread's nutrients and exaggerating the dose can have the opposite effect. Imagine you are taking vitamin C to improve immunity, does it make sense to take the whole package at once? No! Wires, like the body, have the ability to absorb up to a certain limit, more than that can end up causing damage.

How often should I do it?
The interval between one capillary reconstruction and another depends on your capillary schedule, how fragile your locks are and the manufacturer's recommendation for the product you are using. Even considering all these factors, never do it more than once a week, no matter how much you think your hair is torn apart.

Products Indicated for the Treatment
The cosmetics market has grown a lot and today we have many options for hair reconstruction products, there are so many variations that it is difficult to choose which one is the best. Below we have prepared a list of products that have already been tested and approved by our team. You can easily find any of them in cosmetic stores and also on the internet.
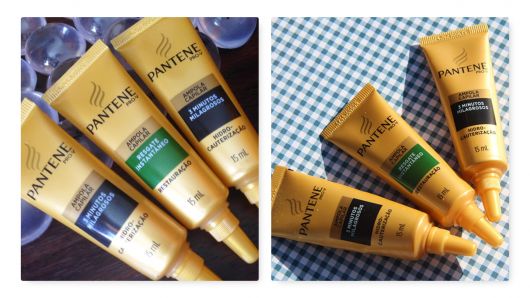
Joico
Joico has several hair reconstruction products that are excellent. Prices vary between R$150 and R$300, thinking in the long term in relation to the number of applications, it is much cheaper than looking for a salon.

L'Oréal
Loreal has similar prices to Joico and the products are also of extreme quality. For those who are unable to spend the value of a pot of mask in one blow, the only tip is to look for capillary reconstruction ampoules. There are several compositions and they cost around R$20.

Forever Liss
Forever Liss has products with slightly more popular and attractive prices. They are quality products that vary between R$70 and R$130. With a good search, it is possible to buy the complete kit to make the hair schedule for less than R$180.

“If you use a reconstruction mask and you don't like it, it doesn't mean the brand isn't good. Each hair adapts to a type of product, what is good for your friend's hair may not be good for you. So our tip is to test until you find the type of product that meets your needs.”
How to do Homemade Hair Reconstruction
Do you already know the best hair reconstruction brands, but need to save money? The good news is that there are excellent home treatments that will make your hair look great without breaking the bank. Of course, with industrialized products the result is better, but the recipes that we are going to show break a good branch.
With Keratin
Hair reconstruction with keratin is super easy, you will only need liquid keratin, a hairdryer and a flat iron. Start by washing your hair 2 times using only shampoo. Remove excess moisture on a towel and apply liquid keratin. It is important to pass only the ends and length of the hair. If you pass it at the root, the thread will become oily and may even stimulate the production of the dandruff fungus.
After spreading the keratin, dry your hair with a hairdryer. Run the flat iron through the loose hair, going over the same strand 3 times. Do this all over your hair.
Is ready! You can wash your hair or leave it to wash the next day. Some professionals call this process cauterization, but ultimately the goal is the same.
With milk
Mix a cup of milk with three tablespoons of olive oil. Apply to clean hair, always on the ends and lengths. Massage the wires well without causing friction.
Wash your hair normally with shampoo and conditioner and you're done!
With Egg
The egg smell is not the most pleasant, but it is a good source of vitamin B that can help rebuild your locks. If you don't have a problem with the smell, just mix an egg yolk in the recipe that we teach you how to make with milk.
After the capillary reconstruction, the tip is to wash it at least twice with shampoo and use the conditioner to make it smell-free.
with vinegar
Apple cider vinegar has been used on locks since our grandma's time. It leaves hair shiny and soft, so much so that some people stop using shampoo to wash with vinegar only.
The recipe is simple: mix 3 spoons of conditioner or moisturizing mask in half a glass of vinegar. Apply to clean hair, let it act for 10 minutes and then wash normally.
ATTENTION: It is not recommended to use another type of vinegar, as it can harm the hair and have the opposite effect to what you want.
With Gelatin
This recipe uses colorless gelatin and a reconstructive mask to enhance the effects. Just dilute the gelatin in warm water and mix it with the mask.
Wash your hair with anti-residue shampoo, rinse and apply the mixture. Massage the wires well for 15 minutes and then wash normally. It is not necessary to shampoo again.
Gelatin can also be used in finishing. Just use it as a gel, because it is rich in collagen, the hair is very shiny and soft. It's a great emergency exit when you're out of your leave-in cream.
Did you like our hair reconstruction tips? Got any questions about how to make it at home? Leave your comment.